Do you want to know how to share your Google Analytics with someone but don't want to give them access to your Google Account? There are a lot of reasons why you should keep even your most trusted web developer or SEO agency away from your Gmail and YouTube search history (did you really watch that many cat videos?)
As you may know, here at flyte we're pretty fond of Google Analytics and set our clients up with this great, free traffic reporting software. Often, new clients (or prospects) already have Google Analytics set up on their current sites, but we need to review their reports so that we can uncover problems and identify opportunities so that they can generate more traffic and leads at their site.
In fact, sometimes even if a client provides their username and password, we still can't log in. That's because of Google's enhanced security features. They want to ensure that it's the client logging in, so a login from a new computer arouses suspicion.
So, to keep your data safe and make it easier for someone else to access just your analytics here's what you need to do…
First, login to your Google Analytics account. At the bottom left of the screen you'll see a button that will take you to your Admin panel. (Sometimes it appears just as the gear icon.)

Your admin panel is made up of three panels: Account (the owner), Property (the website), and View (your reports). While you can manage users (give access) at any level, I recommend giving access at the property level. “Click on User Management.”
Note: Any features in the admin that are grayed out means that you don't have enough privileges to access or change those settings. If you can't share at the property level, see if you can share at the view level. If you can do neither, you'll need to uncover who has administrative level access to your account and have that person take care of it for you.

You'll see a new screen where you can view the users who already have access to this property, their email, and what level of permissions they have. You'll also see a plus sign near the top right. It's not exactly in your face, so I'm pointing at it with a red arrow below. Click there.

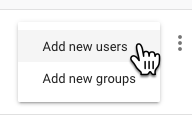
Once you do, you'll have a choice to add new users or add new groups. Choose add new users.

Nice! We're almost done now.
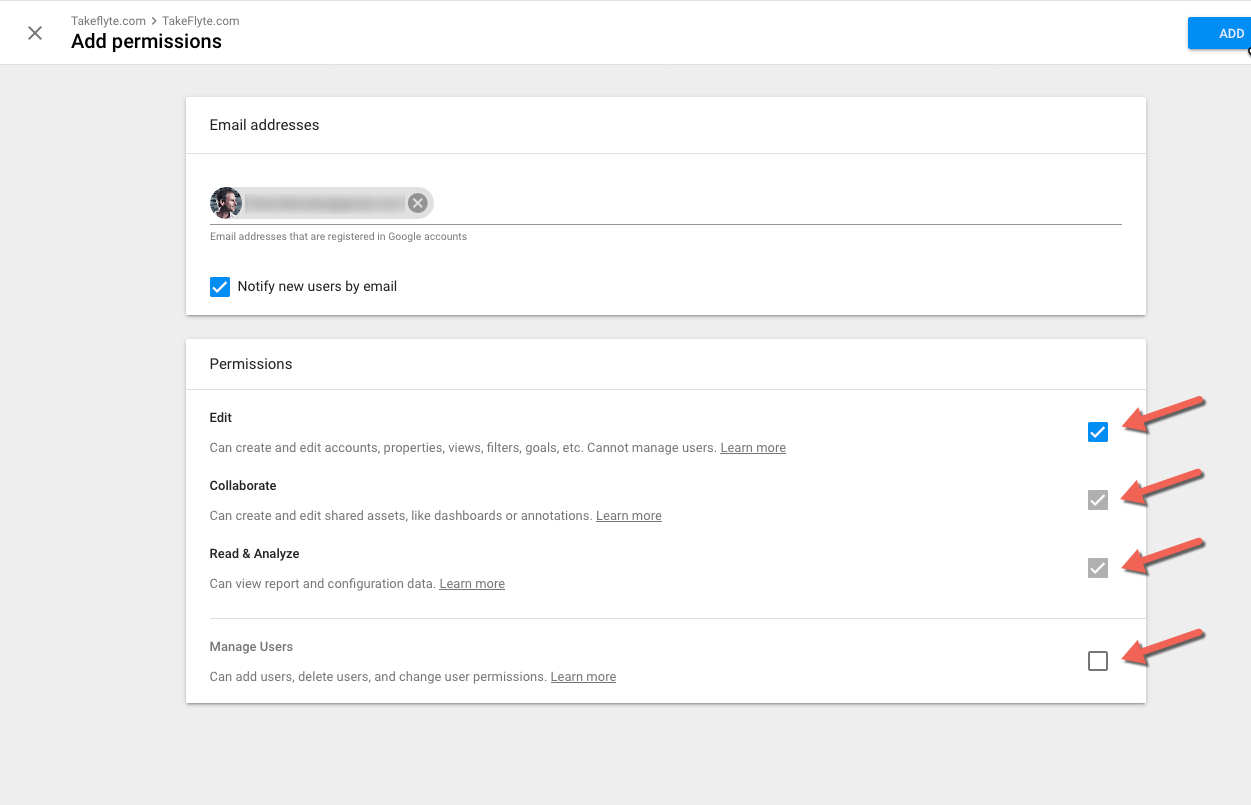
The last step is to actually add the user and provide him or her with the level of access you're comfortable with.

To invite someone to view your analytics, you'll need to know their Google email address, which they should have provided you. It's also a good idea to make sure the “Notify new users by email” button is checked so they get the memo.
Below that, there are four level of access you can provide:
- Edit – Can create and edit accounts, properties, views, filters, goals, etc. Cannot manager users.
- Collaborate – Can create and edit shared assets, like dashboards or annotations.
- Read & Analyze – Can view report and configuration data.
- Manage Users – Can add users, delete users, and change user permissions.
I know that for flyte, we like access to Edit. That allows us to run certain reports, set up filters (which help improve your reporting,) create goals (so you know how you're doing), and more.
Personally, I wouldn't give someone outside my office Manage Users access without a really good reason. They could lock you out of your own analytics that way.
That's all you need to do. Next time they log into their Google Analytics account they'll see a link to your analytics on their dashboard page.
